

19 Feb How to Select a Bike Trainer Stand for Home Use (Beginner Guide)
Cycling enthusiasts no longer need to abandon their training during bad weather or winter months. A bike trainer stand transforms your regular bicycle into a stationary exercise machine right in your living room. However, choosing the right equipment can feel overwhelming for newcomers. This guide walks you through everything you need to know about selecting your first trainer stand.
Why Use a Bike Trainer at Home
Many people discover indoor cycling as a convenient way to maintain fitness year-round. You can exercise regardless of rain, snow, or darkness outside. Additionally, training at home eliminates commute time to the gym and saves money on memberships.
Home training also offers safety benefits. You avoid traffic, aggressive drivers, and dangerous road conditions. Furthermore, you can pause your workout instantly for family needs or emergencies. This flexibility makes beginner indoor cycling particularly appealing for busy parents and professionals.
Another advantage involves structured workouts. You can follow training programs precisely without worrying about hills, wind, or intersections interrupting your intervals. Therefore, many cyclists achieve better fitness gains indoors than on outdoor rides.
Types of Bike Trainer Stands Available
Understanding different trainer types helps you make an informed choice. Each category offers distinct advantages and limitations.
Wheel-On Trainers
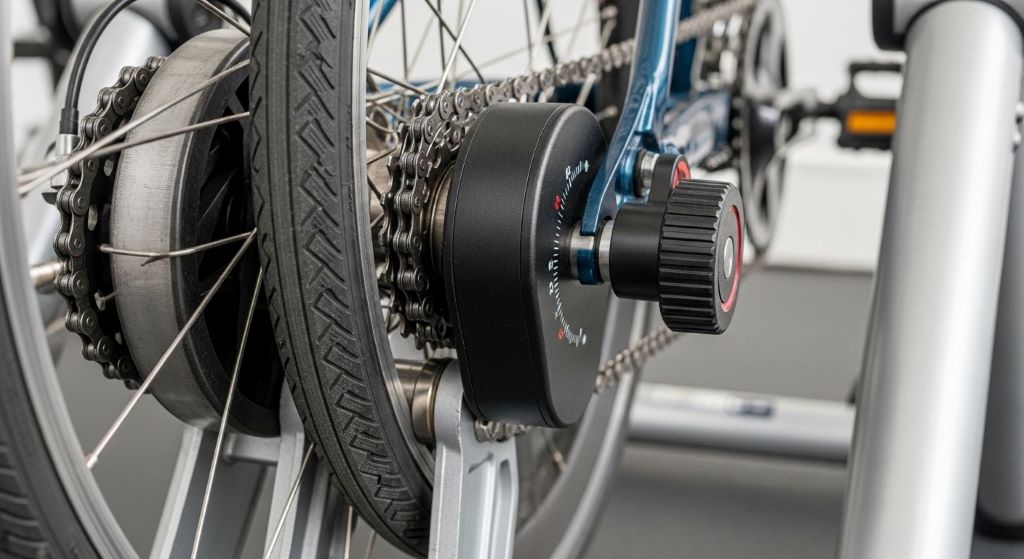
These traditional trainers hold your bike upright while the rear wheel presses against a resistance unit. They remain the most affordable option and work with almost any bicycle. Setup takes just minutes, making them perfect for beginners.
However, wheel-on models create more noise than alternatives. They also cause tire wear over time. Many users purchase special trainer tires to address this issue.
Direct Drive Trainers
Direct drive units require removing your rear wheel entirely. Your bike connects directly to the trainer through the rear axle. This design provides exceptional stability and realistic road feel.
These trainers operate more quietly than wheel-on versions. They also eliminate tire wear completely. Nevertheless, they cost significantly more and require compatible rear axle standards.
Roller Trainers
Rollers consist of three cylindrical drums that support both wheels. Your bike balances freely on top, requiring active engagement to stay upright. This design improves balance and pedaling technique naturally.
Experienced cyclists appreciate the realistic riding experience rollers provide. However, beginners often find them intimidating and difficult to master initially. Therefore, most newcomers choose more stable bike trainer options first.
Key Features to Consider
Several important factors influence your training experience and satisfaction with your purchase.
Resistance Mechanisms
Trainers use different methods to create resistance against your pedaling. Magnetic resistance offers smooth, quiet operation at budget-friendly prices. Fluid resistance feels more realistic and operates even quieter. Smart trainers provide electronic resistance that adjusts automatically based on training apps or virtual courses.
Beginners typically start with magnetic or fluid resistance. These options deliver excellent value without requiring subscriptions or technology setup. Moreover, they work reliably for years with minimal maintenance.
Noise Levels
Sound output matters significantly when training indoors. Loud trainers disturb family members, roommates, or neighbors in apartments. Modern trainers have improved considerably in this area.
Fluid and direct drive trainers operate most quietly. Magnetic trainers produce moderate noise. Meanwhile, basic resistance trainers can generate considerable sound at higher intensities. Consider your living situation when evaluating this factor.
Stability and Build Quality
A stable bike trainer prevents wobbling during intense efforts or standing climbs. Look for wide bases, sturdy construction, and appropriate weight capacity for your body size. Lightweight trainers may save space but often sacrifice stability.
Quality materials ensure longevity and safe operation. Steel frames typically outlast plastic components. Additionally, examine reviews regarding durability and customer service experiences before purchasing.
Compatibility with Your Bicycle
Not all trainers work with every bike. Check compatibility with your wheel size, axle type, and frame design. Road bikes fit most trainers easily. Mountain bikes, fat bikes, and bikes with thru-axles may require adapters.
Measure your rear axle width and type before shopping. Most manufacturers provide compatibility charts on their websites. Furthermore, many bike shops can verify fitment if you bring your bicycle.
Portability and Storage
Consider where you will store your trainer between uses. Some models fold compactly, while others remain permanently assembled. Weight affects how easily you can move the unit between rooms or floors.
Apartments and shared spaces benefit from lightweight, foldable designs. Dedicated training rooms can accommodate larger, heavier units that offer superior stability. Therefore, assess your available space honestly before deciding.
Smart Technology Integration
Modern trainers often include smart capabilities that connect to training apps and platforms. These features enhance motivation and track progress effectively.
Training Apps and Virtual Riding
Applications like Zwift, TrainerRoad, and Rouvy transform indoor cycling into engaging experiences. Virtual worlds, structured workouts, and online competitions keep training interesting. However, these require compatible smart trainers or separate power meters.
Beginners can certainly enjoy cycling without smart features initially. Basic trainers cost less and remove technology learning curves. Nevertheless, many cyclists eventually appreciate the engagement that apps provide during long winter months.
Data Tracking and Metrics
Smart trainers measure power output, cadence, and speed automatically. This data helps you monitor improvement and structure training effectively. Manual trainers require separate cycling computers or smartphone mounts for basic metrics.
Serious cyclists benefit from detailed data analysis. Casual riders may find basic metrics sufficient. Consequently, consider your training goals when evaluating smart features.
Budget Considerations
Bike trainers range from around one hundred dollars to several thousand. Setting a realistic budget helps narrow your options appropriately.
Entry-Level Options
Basic magnetic trainers start around one hundred to two hundred dollars. These provide adequate resistance for general fitness and beginners exploring beginner indoor cycling. They lack advanced features but deliver reliable performance.
Mid-range fluid trainers cost between two hundred and four hundred dollars. They offer smoother resistance and quieter operation. Most recreational cyclists find these models perfectly adequate for their needs.
Premium Choices
Direct drive smart trainers begin around five hundred dollars and extend past two thousand. These units provide the best experience but represent significant investments. They make sense for dedicated cyclists training year-round or preparing for competitive events.
Additionally, remember accessories like training mats, fans, and app subscriptions add to overall costs. Budget accordingly to create a complete training setup.
Setting Up Your Training Space
Creating a dedicated cycling area improves comfort and protects your home.
Floor Protection
Trainer mats prevent damage to flooring and reduce vibration transmission. They also catch sweat that drips during intense workouts. Rubber or foam mats work well and cost relatively little.
Hardwood floors particularly need protection from sweat and potential scratches. Carpet provides some cushioning but may compress over time under heavy trainers.
Ventilation and Temperature
Indoor cycling generates substantial heat. Position your trainer near windows, fans, or air conditioning when possible. Good airflow keeps you comfortable and prevents overheating during hard efforts.
Some cyclists use multiple fans to simulate outdoor wind. This cooling strategy allows longer, more productive workouts. Therefore, plan your space with temperature management in mind.
Entertainment and Motivation
Set up screens for watching training videos, virtual rides, or entertainment. Music systems or podcasts help pass time during longer sessions. Having these elements ready encourages consistent training habits.
Position your bike to face engaging views when possible. Even looking outside can make indoor sessions more pleasant. Experiment with different arrangements to find what motivates you best.
Maintenance and Care
Proper maintenance extends your trainer’s lifespan and ensures safe operation.
Regular Cleaning
Sweat corrodes metal components quickly if left unchecked. Wipe down your trainer and bicycle after every session. Use mild soap and water rather than harsh chemicals that might damage finishes.
Pay special attention to areas where sweat accumulates. The top tube, handlebars, and trainer frame need regular attention. Additionally, place towels over your bike to catch sweat during workouts.
Periodic Inspections
Check mounting points, resistance units, and frame welds periodically. Tighten any loose bolts or connections. Listen for unusual noises that might indicate wear or problems developing.
Replace worn parts promptly to prevent failures during use. Most manufacturers sell replacement resistance units, mounting hardware, and other components. Furthermore, many repairs prove simple enough for home completion.
Making Your Final Decision
Selecting your first trainer involves balancing numerous factors against your specific needs and constraints.
Start by identifying your primary goals. Are you maintaining general fitness, training for events, or simply staying active during winter? Your objectives influence which features matter most.
Next, assess your budget realistically. Remember that consistent training on a basic trainer beats sporadic use of expensive equipment. Choose something you can afford comfortably without financial stress.
Consider your living situation carefully. Apartment dwellers need quieter, compact options. Homeowners with dedicated spaces enjoy more flexibility. Moreover, think about who else shares your living space and how your training might affect them.
Try equipment before purchasing when possible. Many bike shops have display models for testing. Some retailers offer return policies allowing home trials. This hands-on experience proves invaluable for confirming your choice feels right.
Read reviews from actual users rather than relying solely on marketing claims. Look for comments about reliability, customer service, and long-term satisfaction. However, remember that individual preferences vary significantly.
Getting Started with Your New Trainer
Once you bring your trainer home, set it up following manufacturer instructions carefully. Take time to adjust everything properly before your first ride. Rushing through setup can create safety issues or poor experiences.
Start with short, easy sessions initially. Your body needs time adapting to indoor cycling’s unique demands. The lack of coasting, constant pedaling, and different heat management challenge even experienced outdoor cyclists.
Gradually increase duration and intensity as you adapt. Most beginners find twenty to thirty minutes adequate initially. Build from there based on your fitness level and goals. Additionally, vary your workouts to prevent boredom and overuse injuries.
Join online communities for support and motivation. Fellow indoor cyclists share tips, workout ideas, and encouragement. These connections help maintain consistency throughout your training journey.
Conclusion
Choosing a stable bike trainer for home use requires considering multiple factors including trainer type, resistance mechanism, noise level, compatibility, and budget. Beginners should prioritize stability, ease of use, and quiet operation over advanced features. Magnetic and fluid trainers offer excellent value for those new to beginner indoor cycling, while direct drive units provide premium experiences at higher prices.
Remember that the best trainer is one you will actually use consistently. Therefore, select equipment matching your current needs rather than aspirational goals. You can always upgrade later as your experience and commitment grow.
With proper setup, maintenance, and realistic expectations, indoor training becomes an enjoyable part of your cycling routine. Your new trainer will serve you well through countless miles, helping you stay fit and ready for outdoor adventures when weather permits.
Frequently Asked Questions
Do I need a special tire for my bike trainer?
Most wheel-on trainers work with regular tires, but they cause faster wear. Trainer-specific tires last longer and operate more quietly. They typically cost between twenty and forty dollars. However, direct drive trainers eliminate this concern entirely since they do not use your rear wheel.
How much space do I need for a bike trainer setup?
A basic setup requires about six feet by four feet of floor space. This accommodates your bike, trainer, and small movement during riding. Additionally, allow clearance around the bike for mounting, dismounting, and ventilation. Compact trainers and folding designs work well in tighter spaces.
Can I use a mountain bike on a trainer stand?
Yes, most trainers accommodate mountain bikes with standard quick-release axles or thru-axles using appropriate adapters. Check your specific trainer’s compatibility before purchasing. Some trainers include multiple adapters, while others require separate purchases. Wheel size compatibility also matters for wheel-on models.
How loud are bike trainers really?
Noise levels vary significantly by type. Fluid and direct drive trainers operate quietly enough for apartment use. Magnetic trainers produce moderate sound. Basic friction trainers can be quite loud. Placing your trainer on a mat reduces noise transmission through floors considerably.
Should beginners invest in a smart trainer immediately?
Not necessarily. Basic trainers allow you to experience indoor cycling affordably while determining if you enjoy it. Many cyclists use simple trainers successfully for years. However, if budget allows and you know you will train regularly, smart trainers provide excellent motivation through interactive apps and structured workouts.
Related Topics:
The Unsung Hero: Prioritizing Chest Health
How to Take Care Cycling Knee Pain
No Comments