
26 Sep How to Install Rope Clamps Lowes: A Step-by-Step Guide
Have you ever been in a situation where you needed to secure a rope but didn’t quite know how to do it? Perhaps you’re working on a DIY project, setting up a hammock, or just need a reliable way to fasten a rope securely. Well, fear not! Rope clamps are here to save the day, and Lowes has got you covered. In this comprehensive guide, we’re going to take you through the process of installing rope clamps from Lowes in a simple and easy-to-follow manner.
What Are Rope Clamps, and Why Use Them?
Before we start the installation, let’s get to know rope clamps. These nifty little devices, including the wire rope clamp size chart, are designed to securely and adjustably connect two ends of a rope. They come in various sizes and materials, making them versatile for a wide range of applications.
Rope clamps are your trusty companions for tasks like:
- Securing Tarps: Keeping your belongings safe and dry during bad weather.
- Hammock Setup: Creating a relaxing oasis in your backyard.
- Boating and Marine Use: Tying down or towing objects on watercraft.
- DIY Projects: Crafting and building where rope is needed.
Now, let’s get our hands dirty (figuratively) and install those rope clamps from Lowes!
Materials You’ll Need:
- Rope Clamps (purchased from Lowes)
- Rope (the size and length you require)
- A flat surface to work on
- A screwdriver or pliers
- Measuring tape
- Safety gloves (optional but recommended)
Step 1: Prepare Your Workspace
First things first, let’s set the stage. Find a flat and stable surface to work on, like a workbench or a sturdy table. This will ensure you have a secure platform to assemble your rope clamp.
Step 2: Measure and Cut Your Rope
Determine the length of the rope you’ll need for your specific task. Measure it out using a measuring tape and cut it accordingly. Make sure to leave a little extra length to accommodate any adjustments you might need to make later.
Step 3: Open the Rope Clamp
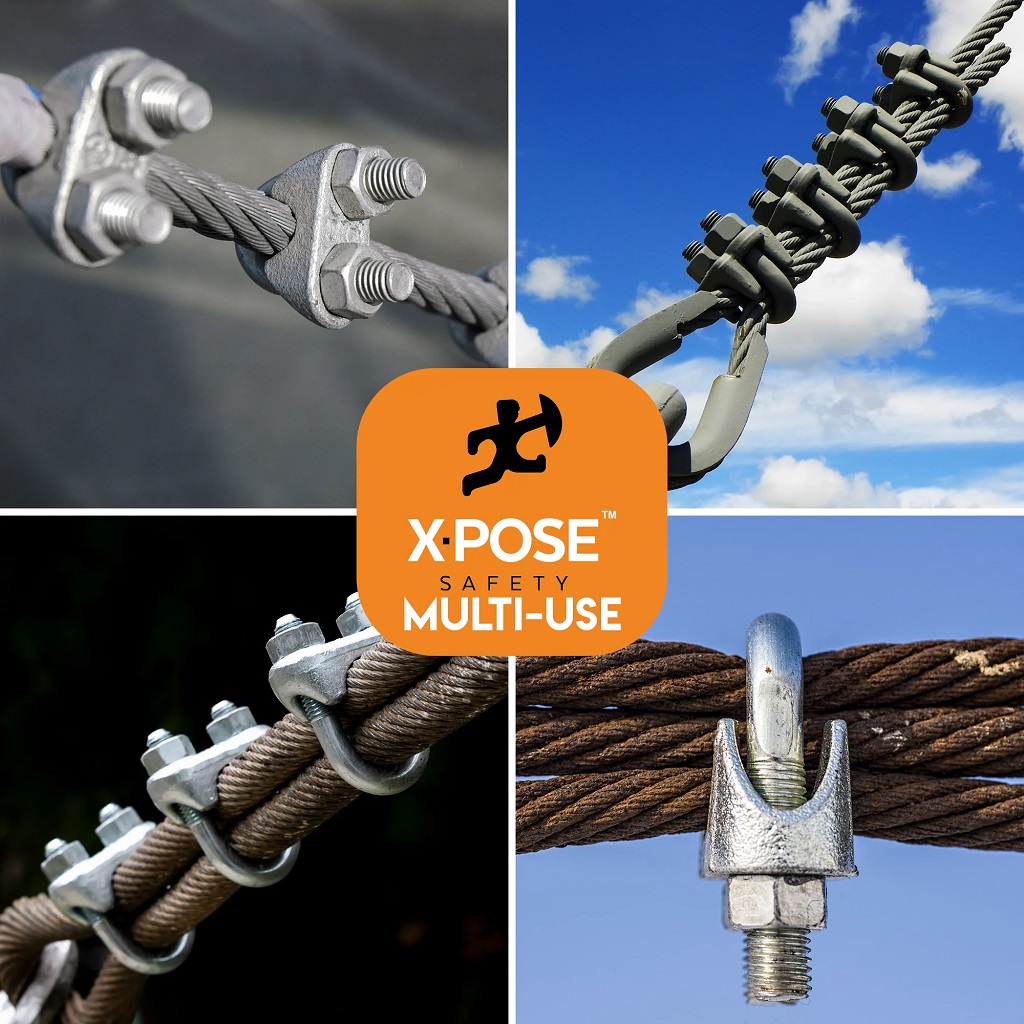
Take your rope clamp out of the packaging. You’ll notice that it consists of two main parts: a U-shaped metal clamp and a threaded bolt with a nut. The U-shaped clamp will have two holes – one for the rope to go through and the other for the threaded bolt.
Step 4: Thread the Rope Through the Clamp
Now, take one end of your cut rope and pass it through the hole in the U-shaped clamp. Pull it through until you have the desired amount of rope sticking out. The length you leave here will determine how tight or loose your rope will be when secured.
Step 5: Insert the Threaded Bolt
With the rope through the clamp, it’s time to insert the threaded bolt through the other hole in the U-shaped clamp. The bolt should go through the hole smoothly.
Step 6: Tighten the Nut
Once the threaded bolt is through the clamp, secure it in place by twisting the nut onto the bolt. Use a screwdriver or pliers to tighten the nut firmly. This action will clamp the U-shaped part of the clamp down onto the rope, creating a tight grip.
Step 7: Test the Grip
Before you finalize everything, it’s always a good idea to test the grip. Pull on the rope to ensure that the clamp is holding it securely. If it slips, you might need to adjust the tightness of the nut. On the other hand, if it’s too tight, you can loosen the nut slightly.
Step 8: Trim Excess Rope (Optional)
If you have excess rope sticking out beyond the clamp, you can trim it with a pair of scissors or a utility knife. Make sure to leave a small tail for added security.
Step 9: Double-Check Your Work
Once you’re satisfied with the grip and the length of the rope, double-check all the components. Ensure the nut is tightly secured, and there are no sharp edges that could cause injury.
Step 10: Repeat for the Other End (If Needed)
If your project requires both ends of the rope to be secured, simply repeat the above steps for the other end.
Congratulations! You’ve Successfully Installed Rope Clamps from Lowes!
You’ve done it! You now have a secure and adjustable connection on your rope, thanks to the rope clamps from Lowes. Whether you’re camping, boating, or working on a DIY project, you can trust that your ropes are safely fastened, but it’s essential to know whether nylon or polyester rope is stronger for your specific needs.
FAQs (Frequently Asked Questions):
- Can I reuse rope clamps?
- Yes, you can reuse rope clamps. If you need to remove a rope clamp from a rope, simply loosen the nut, slide it off, and your rope clamp is ready to use again.
- How do I know what size of rope clamp to use for my project?
- The size of the rope clamp you need depends on the diameter of your rope. Measure the diameter of your rope and choose a rope clamp that matches or slightly exceeds that diameter.
- Can I use rope clamps for heavy-duty applications like towing a vehicle?
- Rope clamps are versatile, but for extremely heavy-duty applications, it’s advisable to use specialized hardware designed for that purpose. Always check the manufacturer’s guidelines for load capacities.
- Are there different types of rope clamps available at Lowes?
- Yes, Lowes typically offers various types of rope clamps, including those made of different materials like stainless steel, zinc-plated steel, and aluminum. Choose the one that suits your specific needs.
- Can I install rope clamps on synthetic ropes, like nylon or polyester?
- Yes, rope clamps can be used with synthetic ropes. Just ensure that the rope clamp you choose is compatible with the material of your rope, and follow the same installation process.
In conclusion
Installing rope clamps from Lowes is a straightforward process that can enhance the versatility and functionality of your ropes. Whether you’re securing your camping gear, setting up a hammock, or tackling DIY projects, rope clamps provide a reliable solution. So, go ahead, grab those rope clamps, and fasten your ropes securely with confidence!
No Comments